This article explained a step-by-step guide on ESP32R4 controller to use with Amazon Alexa. The process is simple, with only 2 steps.
You can interact with Tasmota using Amazon Alexa through its Echo devices.
Step 1: Configure Tasmota app. on ESP32R4.
Update ESP32R4 firmware of Tasmota app to the latest version. Update link
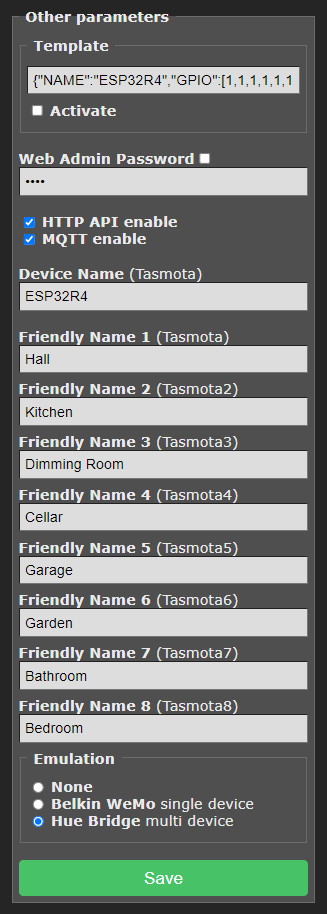
In Configuration – Configure Other page in the webUI select emulation type. – Hue Bridge.
! Check your router settings. You have to enable IGMP
Friendly Name in Tasmota.
Relays and lights with friendly names beginning with a dollar sign ($) will cause Tasmota to not “announce” them (i.e., be hidden) to Alexa. If they were previously discovered, they will still continue to work.
As there are only 4 friendly names provided in Tasmota, if FriendlyName4 begins with $, component 4 and all higher numbered discoverable components will not be discovered by Alexa.
Step 2: Configure the Amazon Alexa app on your smartphone.
1. On Alexa app. Device – Add Device – Light – Other – Discover device – configure name of device for Alexa

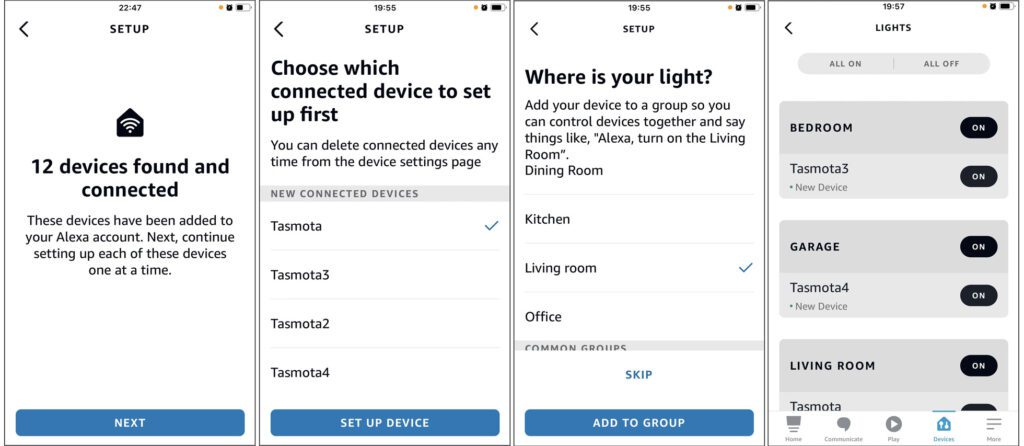
Now you can control ESP32R4 Tasmota device with Alexa Echo or Alexa app on your smartphone.
With Alexa, you can create voice-first experiences that provide a more intuitive way to interact with lights, switches, and plugs.
Turn On and Off
It is simply to use their voice to turn on and off lights and plugged in devices with Alexa. For example, for switch on the light in kitchen: “Alexa, turn on kitchen light.”
Automated Routines
You can use Alexa app to schedule or set automated experiences based on time-of-day and triggers.
Smart Home Groups
Add your devices to Groups to control multiple smart home devices with simple commands, like “Alexa, good night” to switch off all lights.